How To: Install an Oil Pressure Sensor
Note: You can do this without K-Pro, but you'd be also making connections and mounting a gauge in your interior. I included some information about that, but this is mainly centered around a K-Pro user.
So, you're getting serious about your car's sensor package? Data is hugely important in racing as well as general automotive maintenance. Oil pressure is one of the most relevant data points to track on an RSX.
 |
| A Pressure Sensor |
Note: If you purchase your supplies from my Amazon links, it will support this website at no extra cost to you. : ) Thank you.
Potential Uses and Background
When you look at the coolant gauge as your car warms up, you're just looking at the coolant temperature (obviously). This doesn't exactly mirror the temperature of the oil in the system. It also doesn't let you know when the engine is fully heat soaked and all the temperature-related clearances are met.
Engine oil pressure give you insight into engine clearances and flow. When combined with data on heat cycles and engine load, it can potentially be used to estimate remaining oil life.
Additionally, VTEC is actuated with oil pressure, so having that data can lend a hand in diagnosing any problems with that system.
At exceptionally low pressures, you can tell if the oil level is low. At high pressures, you can diagnose an oil blockage.
The OEM "Solution"
So why didn't Acura put an oil pressure sensor in the RSX if this metric is so important?
They kind of did, but "dumber". The K-series engines have oil pressure switches. Also refered to as a pressure sender, it's a simple one-wire device that sends a signal to the ECU if the oil pressure drops below 10 PSI. Under this condition, the MIL is lit, and a "limp mode" is activated. While this is a nice safeguard, there's no provisions for diagnosing what's actually going on in one of the most important systems in the car.
Required Supplies
- 150 PSI Pressure Sensor
- Oil Filter Sandwich Plate
- Oil Line and Adapters
- 3-Conductor Cable (25ft)
- Auto-Wire Strippers
- Heatshrink
- Soldering Iron
- Solder
- JIS Screwdriver
- Socket Set
- Windshield Cowl Clips
- Clip Removal Tool
- AEM Oil Pressure Gauge (Optional)
The Install
Note: Something important to know about installing an auxiliary analog sensor, such as this one, is that K-Pro will not report analog sensor data over Bluetooth. The Hondata Android and iPhone apps only allow Bluetooth connections, so if that's how you're displaying data, you're out of luck it seems.
However, you can output that data over CAN if you have a race-dash or custom computer setup. Outputing the data over USB works also, but viewing it in the Hondata software isn't that great.
 |
| An Alternative To Hondata Data Output Is A Physical Gauge, Like This One |
Assembly and Sensor Placement
Before you start attaching things to the engine, put it all together and figure out the placement of the sensor and line.
Choose which port in the oil filter sandwich plate you would like to use for the oil line. This depends on where you plan on locating your sensor. Be mindful of the area around the exhaust manifold, as this is an exceptionally hot area.
Do not mount the sensor directly to the oil filter sandwich plate, there's tons of evidence that engine vibrations can break the sensor off over time. The line is an important part of the formula.
Also keep in mind that steel braided line will either rub against something and rub through it, or the other surface will cut through the line, so it needs to be held firmly away from painted surfaces or anything else it could contact when the engine moves around.
 |
| This Is How The Line Looks After Closing Everything Up |
Use the plugs included with the sandwich plate and rub a thin layer of grey silicone or Hondabond on the plug threads, and then get them in the sandwich plate tight, but not too tight so you don't crack the plate. Use your best judgment, and realize that the sealant will be doing a lot of the sealing.
Attach the oil line to the oil filter sandwich plate and do the same procedure with the grey silicone on the threads.
Drain your oil, as we need to remove the oil filter. Once this is done, remove the oil filter and place on the oil filter sandwich plate.
Stick a finger in an oil container and wipe a film onto the rubber seal of the oil filter sandwich plate against the engine block so it doesn't stick and rip.
Tighten the shaft on top of the sandwich plate, that the oil filter will tighten onto. I put a bit of blue Loctite onto the inside of the threads going onto the block, and tightened it until it felt snug. I didn't want to overtighten it, so I'm using the Loctite to augment that bond.
Put on a new oil filter, and get it nice and tight with gloved hands to get a little better grip.
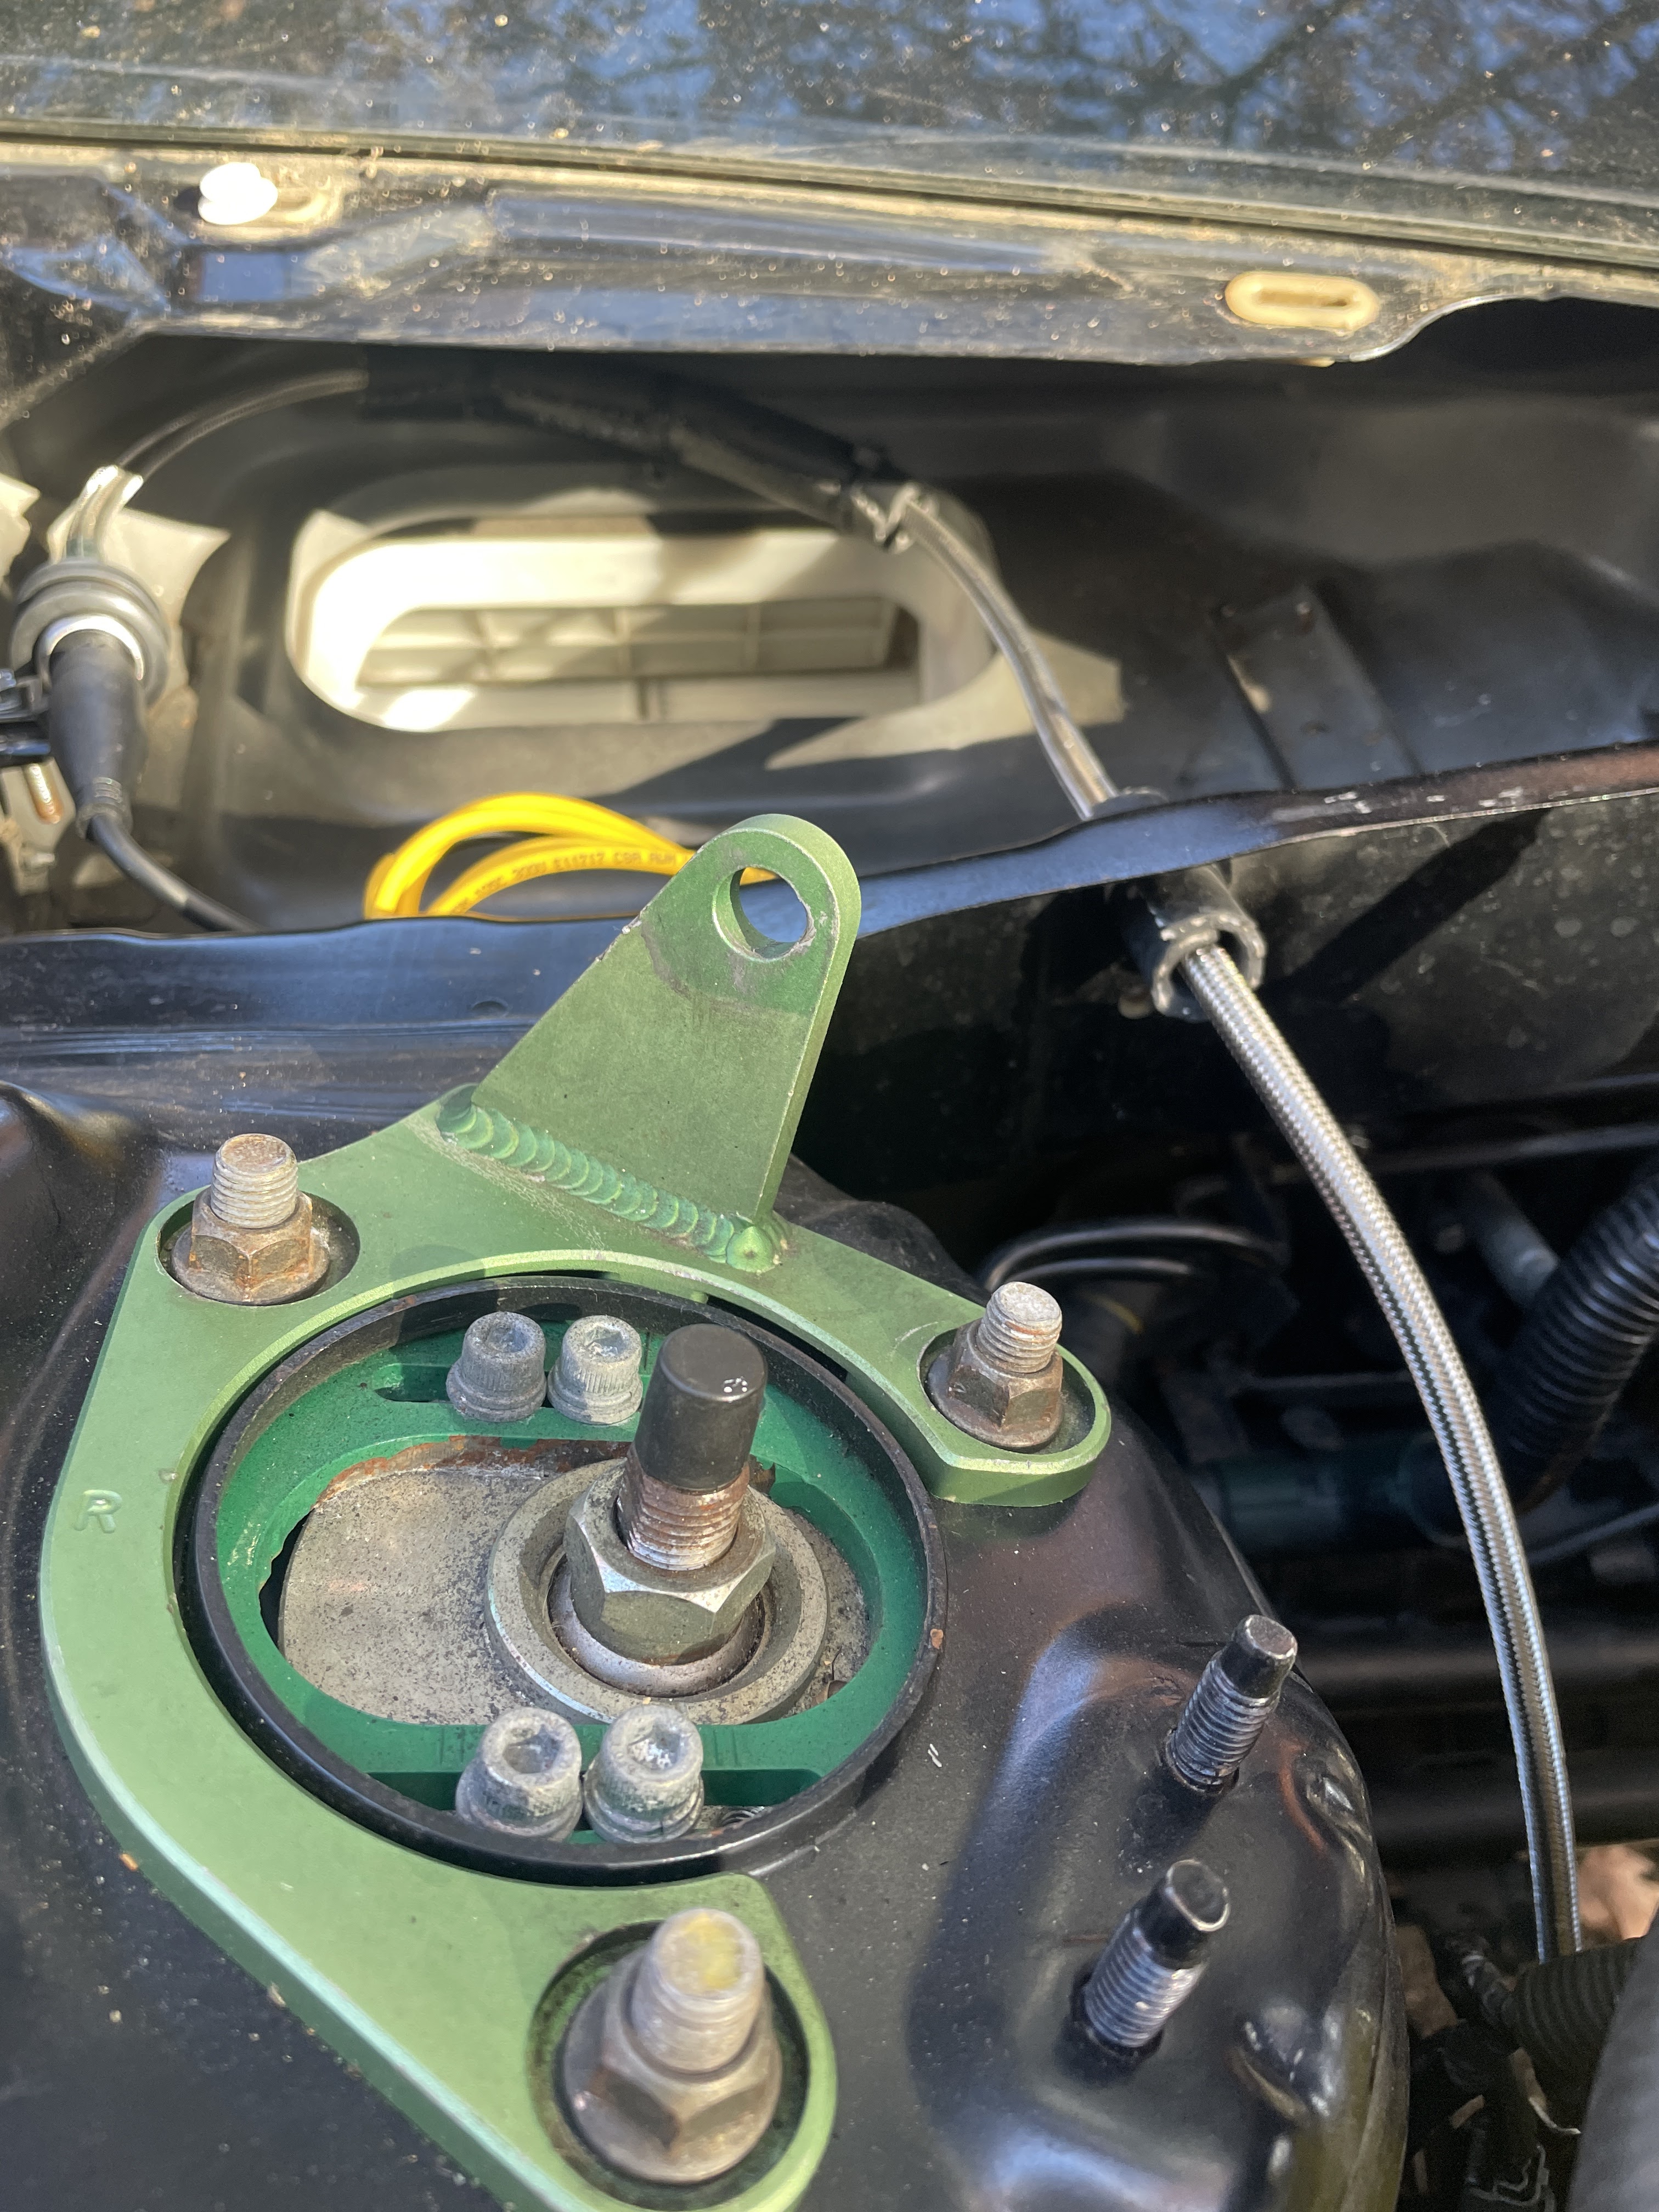
 |
| A View Of The Oil Filter Sandwich Plate On The Car |
I personally routed the stainless steel braided line up through where the cruise control line came from originally since I no longer have cruise control. I routed the line and wrapped contact areas in some spare rubber hose and held it on with zip ties to avoid damaging anything or having an oil leak.
I removed the wiper cowl by popping off 2 push-pins, and then smoothly pulling back on the plastic panel. There are 3 white plastic pins. There's also a rubber piece you'll pull off on the left corner. Be careful not to break them, but I included a link to the plastic clips in my "required parts" section of this article if you do.
The oil line is held in a rubber lined clamp that came with the oil line. I installed it into an already-tapped hole with an M6x1.0 bolt.
 |
| You Can See My Mount Bolted In On The Left. The Rubber Hose Is Used To Stop Rubbing |
When you're done routing the oil line and connecting the oil pressure sensor and the sealant is dry (in practice, usually 48 hours later, not 24), put the oil drain bolt back in and fill your car with oil to the specs I mention in my article on oil in the RSX.
Wiring
There are 3 important connections in this job; the sensor wiring and colors are:
- Power (VCC) (5V) (RED)
- Sensor Ground (SGND) (BLACK)
- Signal (Output) (GREEN)

In this example, on the E connector on the ECU, E4 sensor ground is used (E4 SG3). Fortunately since this is a pressure sensor, you can just use one of the ground wires on the K-Pro analog input board. You do need to get 5V from E5 though. I wrapped a wire around the E5 pin an soldered it very carefully to avoid bridging pins, but you can also splice into the wire.
I soldered all these connections, and put heatshrink on them to protect them. I also added a small pinned connector that I can remove without having to cut wires.
Removing the ECU involves removing some clips from the carpeted cover, removing 3 10mm bolts holding the ECU in, and unplugging the connectors. The 4 screws on the ECU top case are JIS bit (not to be confused with Phillips bit) so I included JIS screwdrivers in the materials for this project. They're known for stripping out due to their torque limiting design with normal Phillips head screwdrivers.
 |
| This Picture Shows E4 and E5. They're At The Bottom Of The Connector From This View, Counting From The Right |
 |
| My Initial Connection Was Directly To The ECU Pins |
 |
| Make Sure You're Soldering To The Right Connector! |
Cable routing was pretty easy, but I've been doing it for a while. I electrical taped the cable I wanted to use to a sharpened metal coat hanger, and rubbed some hand soap on it to make it push through easier. I pushed it through under the steering rack on the driver's side of the engine bay. It comes out behind the throttle pedal, and I routed it through the back of the heater core assembly towards the ECU.
Once I had the correct length plus a foot of slack or so, I went back into the engine bay and routed the other end through an empty screw hole that led under the wiper cowl.
I gave the cable 2-3 feet of slack in case I wanted to move the sensor location later, and cut it to length. I soldered all the connections and put heatshrink on them to protect from the elements.
K-Pro Configuration
At this point, connect your laptop to the K-Pro ECU and turn the key in the ignition to position "II". In the "Hondata Kmanager" software, you need to download the tune from the ECU and save it on your computer before you edit it.
 |
| Once Connected, "Download" Will Be Clickable |
After downloading the tune, back it up by doing this.
 |
| Click "Save As", And Put It Somewhere Safe With A Common Sense Name |
After this, open the "Parameters" window, and go to the "Analog Inputs" section. If you're using the same sensor I am, these are the settings you need to make it work properly.
 |
| 10.34 bar = 150 PSI |
As an aside, I did have an issue with my "custom inputs", so I wanted to draw attention to the issue in my picture above, but here's some documentation in case you decide you want to use a custom sensor conversion with another type of sensor.
 |
| Documentation Based Upon The "Value" Column Under "Custom Input" |
Once you're finished putting the data into Kmanager, you have to upload the data back to the ECU. There's a button with an "up arrow" that you can click on to upload the changes from the tune.
 |
| Upload Tune Button |
Expected Data Values
When you start up the car, cold, the oil pressure reads around 90 PSI in my car. As the car gets closer to operating temperature, the oil pressure will drop gradually until it reaches 20-30 PSI. Revving the engine will cause the oil pressure to rise, since the oil pump is coupled via chain to the crank pulley.
Pressures will differ depending upon oil viscosity. I'm currently using 5W-30 oil in my RSX, and have confirmed that these values make sense for the platform.
Troubleshooting
 |
| VCC Measurement |
If your sensor isn't reading, double check that you're getting right about 5V (mine was 5.04V) at the sensor. You can do that by measuring across the terminals of the electrical connector at the sensor with the key switched to position II.

Put a multimeter probe in "GND" and "Vcc" to take this measurement. You can also measure this at the ECU, but the connection near the sensor is more telling because it lets you diagnose the entire cable length too.

You can also measure the "output" reading. Plug the sensor back in, start the car, and in the ECU, carefully put on multimeter probe on "Analog 0" and one on a "Ground". Depending on how hot the car is, the reading should be between 0.5V and 4.5V.
Additionally, if you're getting extremely high numbers in K-Manager like 500-1100 PSI, you need to fix your units in the "custom input" section as I mentioned above.
And with that, you're all done! You can officially datalog oil pressure on your laps on the street, strip, or track. You can diagnose oiling issues more easily. This "mod" is actually really cool for a lot of reasons. Thanks for doing it with me!
Disclaimer:
I may receive payment if you purchase products using my Amazon links. Thanks for helping keep the HID's on : )


